

Thinking about tackling brake pad replacement on your Nissan yourself? It might sound a bit much, but honestly, with the right approach, it’s totally doable. This guide is here to walk you through how to replace Nissan brake pads safely, step-by-step. We’ll cover everything from getting your car ready to putting the new pads in, making sure you feel confident about keeping your brakes in good shape. Whether you’re driving an Altima, Pathfinder, or Rogue, these tips will help you get the job done right, saving you time and money.
Key Takeaways
- Always park your Nissan on a level surface and engage the parking brake before starting any brake work.
- Gather all necessary tools, including a jack, jack stands, lug wrench, and a C-clamp or brake piston tool, before you begin.
- Loosen lug nuts before lifting, then safely lift the vehicle and secure it with jack stands before removing the wheels.
- Carefully remove the old brake pads and caliper, then install the new pads, applying brake grease where needed and ensuring they fit snugly.
- After reassembly, test your brakes in a safe, open area before driving in traffic.
Preparing Your Nissan For A Safe Brake Pad Replacement
Park Safely and Secure Your Vehicle
Before you even think about touching a wrench, the very first thing you need to do is find a good spot to work. Always park your Nissan on a completely level surface. Seriously, don’t try to do this on a slope, even a small one. Your car could roll while you’ve got it jacked up, and that’s a recipe for a really bad day. Once it’s parked on flat ground, yank that parking brake up tight. Then, grab some wheel chocks – those little wedges you can buy at an auto parts store – and shove them behind the tires that are staying on the ground. This adds an extra layer of security against rolling. And obviously, make sure the engine is off and the keys are out of the ignition.
Working on your car can be messy and sometimes a bit dangerous if you’re not careful. Taking a few extra minutes to set up your workspace properly, like making sure the car won’t move, is way better than dealing with a problem later.
Ensure Your Nissan Is Ready For Service
Okay, so the car is parked and secured. Now, let’s talk about the gear you’ll need. You’ll want to have your jack and, more importantly, your jack stands ready. Never, ever rely solely on the jack to hold the car up. Jack stands are what keep the vehicle stable and safe while you’re working underneath it. Make sure your jack is rated for the weight of your Nissan and that the jack stands are positioned correctly on the frame. It’s also a good idea to have some brake cleaner on hand to clean up parts as you go, and maybe a wire brush to knock off any rust. Having everything laid out and ready to go makes the whole process much smoother.
Gather Essential Tools and Supplies
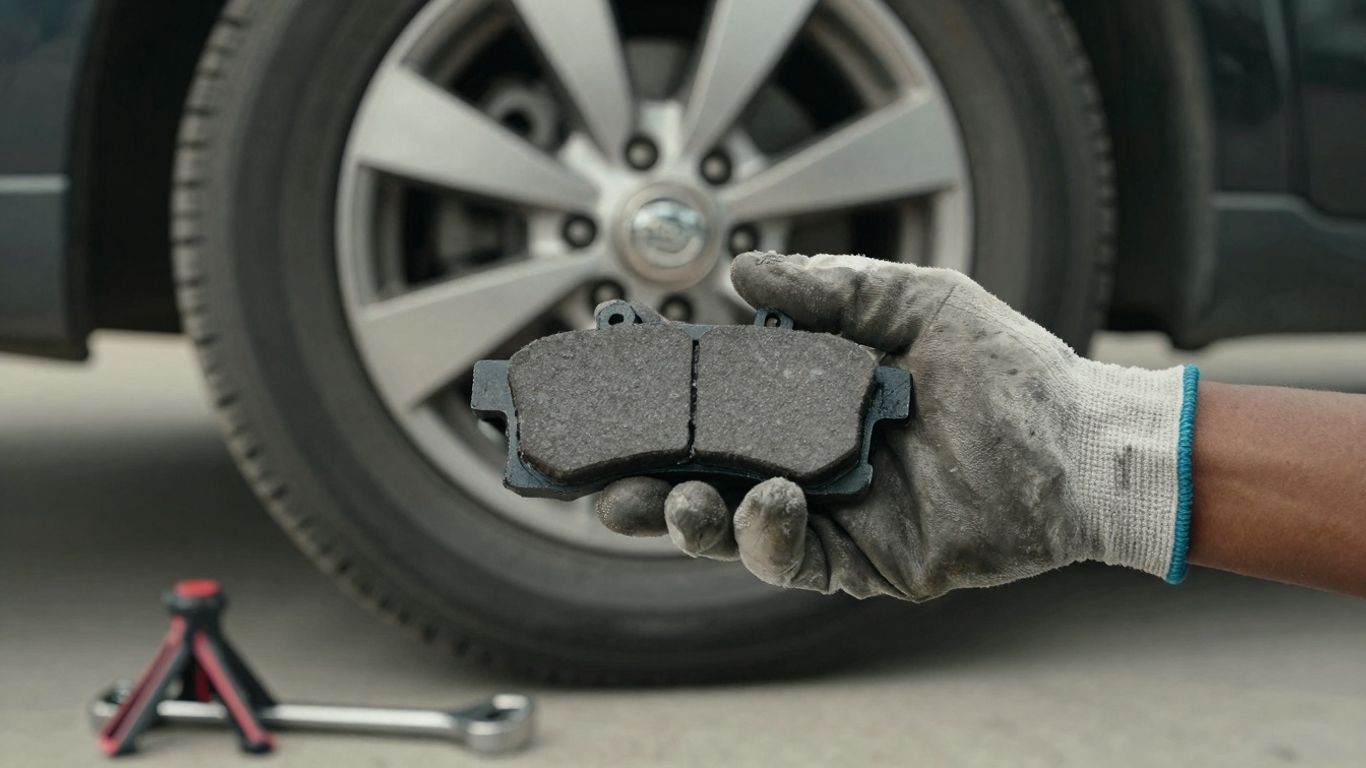
Getting your tools together beforehand is a big time-saver. You’ll definitely need a lug wrench to get the wheels off, and a socket set or wrenches for the caliper bolts. A C-clamp or a specialized brake piston tool is usually needed to push the caliper piston back in. Don’t forget your new brake pads, of course, and make sure they’re the right ones for your specific Nissan model – checking the part number is key. Some people like to have a torque wrench to tighten the lug nuts back to spec, which is a good idea if you have one. And, as mentioned, some brake cleaner and a wire brush can be really helpful for cleaning up the caliper bracket and hub. Safety glasses and gloves are a must, too. You don’t want brake dust or rust getting in your eyes or on your skin.
Step-By-Step Guide To Replacing Nissan Brake Pads
Alright, let’s get down to business with actually swapping out those old brake pads for new ones on your Nissan. It might seem a bit involved, but if you take it one step at a time, you’ll be just fine. Remember, safety first, always.
Loosen Lug Nuts and Lift Vehicle Safely
Before you even think about jacking up your car, grab your lug wrench and give those lug nuts on the wheel you’re working on a good loosen. Don’t take them all the way off yet, just break them free. This is way easier to do when the tire is still firmly on the ground. Once they’re loose, find your car’s jacking point – check your owner’s manual if you’re not sure – and get that jack in place. Slowly raise the vehicle until the tire is completely off the ground. Now, and this is super important, slide some sturdy jack stands under the frame near the jack point. Lower the car gently onto the stands. Give the car a little shake to make sure it’s stable. Never, ever work under a car supported only by a jack.
Remove Wheels and Inspect Brake Assembly
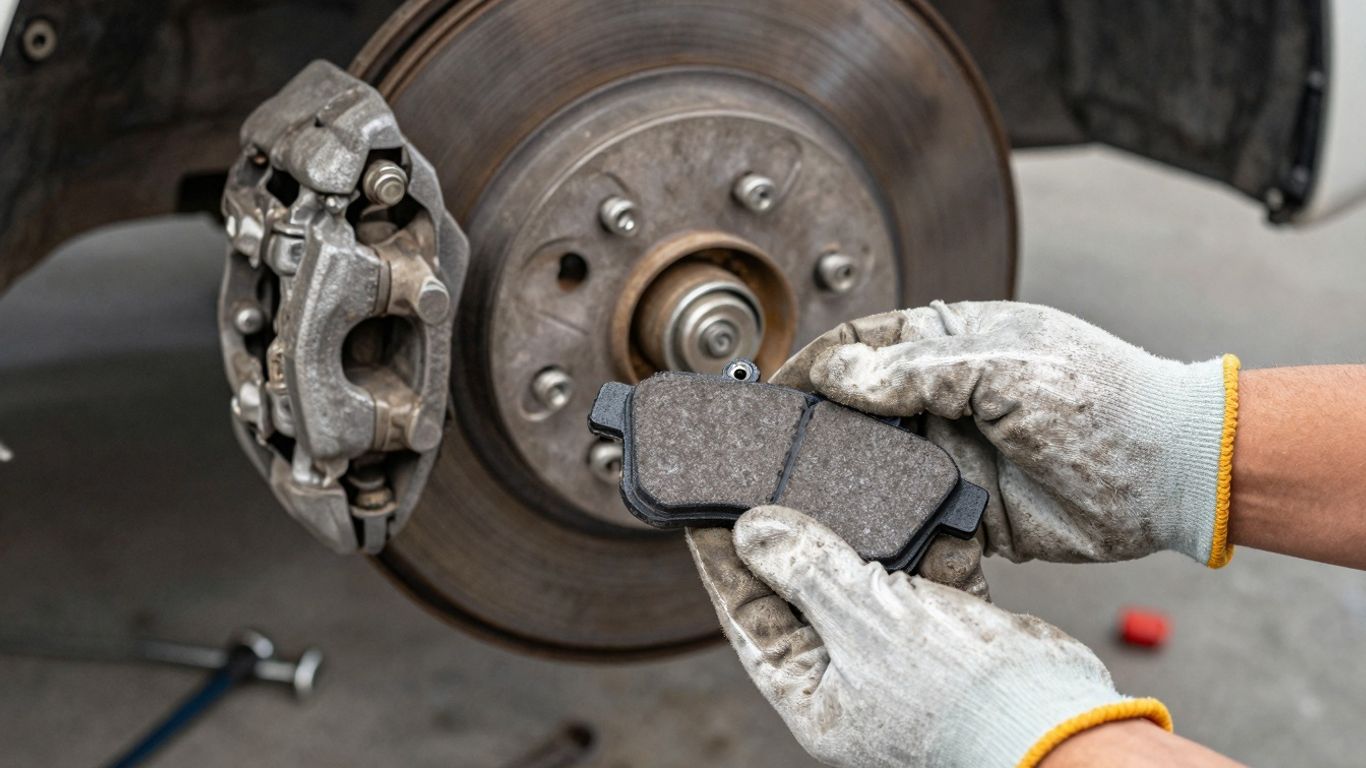
With the car safely on jack stands, you can now go ahead and fully remove those lug nuts you loosened earlier. Keep them somewhere safe, maybe in a cup or a magnetic tray. Then, pull the wheel straight off the studs. Set it aside. Now you’re looking at your brake assembly. Take a good look at the rotor – that’s the shiny metal disc. Check it for any deep grooves, cracks, or signs of warping. Also, give the brake caliper a once-over. This is the part that clamps down on the rotor.
Remove Old Brake Pads and Caliper
Next up is getting the caliper out of the way. You’ll usually find two bolts holding it in place, often on the back side. Use your wrench or socket set to remove these bolts. Once they’re out, you should be able to carefully slide the caliper up and off the rotor. Don’t let it just hang there by the brake line; that’s a recipe for disaster. Use a piece of wire or a bungee cord to hang it from the suspension spring or strut. Now you can see the old brake pads. They usually just slide out of their bracket. You might also need to remove some metal clips that hold them in place. If your new pads came with new clips, now’s the time to swap them out.
Install New Nissan Brake Pads Correctly
Before you put the new pads in, you’ve got to deal with the caliper pistons. They’ve probably been pushed out by the worn-down pads. You need to push them back in to make room for the new, thicker pads. A C-clamp can work for simpler setups, but a dedicated brake piston tool is better. Apply steady pressure and push them back into the caliper body. Keep an eye on your brake fluid reservoir; pushing the pistons back can raise the fluid level, so you might need to siphon a little out if it gets too high. Now, apply a tiny bit of brake grease to the back of the new pads where they contact the caliper and to any metal-on-metal contact points, but be careful not to get any grease on the friction material itself. Slide the new pads into the bracket where the old ones came out. They should fit snugly. Once the pads are in, carefully slide the caliper back down over the rotor and pads. Reinstall and tighten those caliper bolts you removed earlier. You’re almost there!
It’s really important to work on one wheel at a time. This way, if you get stuck or forget a step, you can always look at the other side for reference. Plus, it keeps your car more stable than having both front wheels off at once.
Here’s a quick look at what you’re dealing with:
| Component | Function |
|---|---|
| Brake Rotor | The spinning metal disc. |
| Brake Caliper | Houses the brake pads and piston(s); clamps onto the rotor. |
| Brake Pads | Friction material that presses against the rotor to slow the car. |
| Caliper Bolts | Secure the caliper to the bracket. |
| Lug Nuts | Hold the wheel onto the hub. |
Reassembly And Final Checks
Reassemble Brake Components
Alright, so you’ve got those shiny new brake pads sitting pretty in the caliper bracket. Now it’s time to put everything back together. First things first, you’ll need to slide the brake caliper back over the new pads and the rotor. Make sure it lines up correctly. If you had to push the caliper piston back, this is where it all comes together. Once the caliper is in place, reinsert those slider bolts or pins you removed earlier. Don’t just jam them in there; tighten them up. It’s a good idea to check your Nissan’s service manual for the exact torque spec, but snug is usually good enough for most DIYers. Just don’t overtighten them, or you could strip the threads. It’s also a good time to double-check that no brake lines are kinked or stressed.
Reinstall Wheels and Tighten Lug Nuts
With the brake caliper all secured, it’s time to get the wheel back on. Carefully lift the wheel and align it with the studs. Thread the lug nuts on by hand first. This helps prevent cross-threading. Once they’re all snug, grab your lug wrench. Tighten the lug nuts in a star or crisscross pattern. This ensures the wheel seats evenly against the hub. Go around a couple of times, tightening each nut a little more each pass, until they’re all good and tight. Don’t just crank on one with all your might; even pressure is key.
Test Brakes In A Safe Area
Before you hit the highway, you absolutely have to test your brakes. Find an empty parking lot or a quiet street with no traffic. Start by gently pressing the brake pedal a few times while the car is still stopped. You should feel the pedal firm up as the new pads seat against the rotor. Then, at a slow speed, like 5-10 mph, apply the brakes. Listen for any weird noises and feel for any pulling or vibrations. Gradually increase your speed and braking intensity, but still keep it controlled. Do this a few times. This process, often called ‘bedding in’ the brakes, helps the new pads and rotors mate properly for optimal performance. It’s also a good way to catch any issues before you’re relying on them in a real-world situation.
Remember, brake fluid levels can rise when you push the caliper pistons back. Keep an eye on the reservoir and remove a little fluid if it looks like it’s going to overflow. Too much fluid can cause problems later on.
Understanding Nissan Brake Pad Wear
Your Nissan’s brake pads are like the tires of your braking system – they’re designed to wear down over time. It’s not something you usually think about until there’s a problem, but paying attention to how they’re doing can save you a headache, and maybe even some money. Knowing the signs of worn brake pads is key to keeping your Nissan safe and performing its best.
Signs Your Nissan Needs New Brake Pads
Sometimes, your car will tell you it’s time for new brake pads. The most common clue is a noise. You might hear a high-pitched squeal when you brake, especially at lower speeds. This is often caused by a small metal indicator on the pad that scrapes against the rotor when the pad material is getting thin. If you ignore that squeal and keep driving, you might start hearing a much louder, more concerning grinding sound. That’s usually a sign that the pad material is completely gone, and you’re grinding metal on metal, which is bad news for your rotors and can be expensive to fix.
Another sign is if your car takes longer to stop than it used to. If you notice you have to push the brake pedal further down, or it just doesn’t feel as responsive, your pads might be worn out. It’s also worth noting that driving in stop-and-go traffic, like you might find in busier areas, wears down brake pads faster than steady highway driving. So, if you do a lot of city driving, it’s a good idea to check your pads a bit more often.
Dashboard Brake Warnings Explained
Modern Nissans often have built-in warning systems. You might see a light on your dashboard that looks like a circle with an exclamation mark inside, or it might just say "BRAKE SYSTEM." Don’t ignore these lights. They can indicate a variety of brake issues, including worn-out brake pads, low brake fluid, or even a problem with the parking brake. If one of these lights comes on, it’s best to get it checked out sooner rather than later. Sometimes, a simple brake pad replacement is all that’s needed, but if you wait too long, you could cause damage to other parts of your braking system, making the repair more costly.
Factors Affecting Brake Pad Lifespan
Several things can influence how long your brake pads last. Your driving habits play a big role. If you tend to brake hard and late, or if you frequently drive in heavy traffic with lots of stopping and starting, your pads will wear out faster. The type of driving you do matters too; city driving is generally harder on brakes than highway cruising. The weight of your vehicle also makes a difference. A heavier vehicle, like a Nissan Pathfinder, will put more stress on its brakes than a lighter car like an Altima, potentially leading to quicker wear.
The material of the brake pads themselves also affects their lifespan and performance. Ceramic pads often last longer and produce less dust but might offer slightly less initial bite compared to semi-metallic pads. The choice of pad material, along with how you drive, will determine how often you need to replace them.
Here’s a general idea of what you might expect, though actual mileage can vary a lot:
| Vehicle Type | Typical Brake Pad Lifespan (Miles) |
|---|---|
| Compact Car (e.g., Altima) | 30,000 – 50,000 |
| Mid-size SUV (e.g., Rogue) | 25,000 – 45,000 |
| Larger SUV/Truck (e.g., Pathfinder) | 20,000 – 40,000 |
Remember, these are just estimates. Regular checks are the best way to know for sure when your Nissan’s brake pads need attention.
Model-Specific Considerations For Nissan Brakes
Altima Brake Pad Nuances
When you’re working on an Altima, especially newer models, you might notice the brake calipers and pads are a bit smaller. This is common for a sedan designed for efficiency. It means you’ll want to double-check the exact size of the new pads before you buy them. Getting the wrong size means they won’t fit, and you’ll be back at the auto parts store. Some Altima trims might use different pad materials, too, so always confirm compatibility with your specific year and trim level. It’s a good idea to have the old pads with you when you go to buy new ones.
Pathfinder Brake System Differences
The Pathfinder is built for more rugged use, often carrying passengers or towing. Because of this, its brake system is generally more robust. You’ll likely encounter larger calipers and thicker brake pads compared to the Altima. This beefier setup is designed to handle more weight and heat. When replacing pads on a Pathfinder, pay close attention to the rotors as well. The extra strain can sometimes lead to faster rotor wear or warping, so inspect them carefully for any deep grooves or uneven surfaces. If they look questionable, it might be time to replace them too.
Rogue Brake Component Variations
For the Nissan Rogue, you’re looking at a system that balances performance with everyday driving. The brake components might be lighter than those on a Pathfinder but generally more substantial than some Altima configurations. This can lead to slightly different wear patterns. You might find that the pads wear more evenly across the board. When you’re doing the replacement, make sure the hardware, like the clips and springs that hold the pads, are clean and not rusted. Sometimes, these small parts can cause issues if they’re not in good shape.
Regardless of the Nissan model you’re working on, always take a moment to check the brake fluid level. If it’s low, top it off with the correct type of fluid. However, if you find the fluid level drops again after topping it up, it could signal a leak somewhere in the system, which needs immediate attention.
| Vehicle Model | Typical Pad Thickness (New) | Rotor Size Consideration |
|---|---|---|
| Altima | Thinner | Standard |
| Pathfinder | Thicker | Larger |
| Rogue | Moderate | Moderate |
Wrapping Up Your Brake Job
So, you’ve gone through the steps and replaced your Nissan’s brake pads. Nice job! It might have seemed like a lot at first, but you tackled it. Remember, keeping up with your brakes is super important for staying safe on the road, whether you’re cruising around town or heading out on a longer trip. If you ever feel unsure about any part of the process, or if something just doesn’t feel right, don’t hesitate to reach out to the pros at Riverhead Nissan. They’re there to help keep your ride running smoothly and safely. Happy driving!